


Summary: Data loss may happen in macOS Big Sur. Don’t be panic. Here I will show you the best data recovery software for macOS Big Sur. Also, you will get a quick guide to recover lost files step by step with the file recovery software.
File recovery software is urgently needed if you unfortunately lost important data in macOS Big Sur. To recover lost files in macOS Big Sur effectively, you have to choose a reliable data recovery tool first. As one of the best Mac data recovery software, Do Your Data Recovery for Mac is highly suggested for you. It’s fully compatible with the new macOS Big Sur and it can recover lost files securely.


Common issues that will lead to data loss in macOS Big Sur
Data loss always happen on computers for different reasons. If you are not careful enough, or some other unforeseen issues will cause data loss in macOS Big Sur. I will show you some of the main issues that will cause data loss as follows.
- Accidental deletion. It’s very common for users to deleted files in order to remove some files and clear the drive.However, some files would be deleted wrongly.
- Erase drive by mistake. If there are some hard drives connected, please ensure to be careful when you try to erase a drive. Otherwise, data loss will happen if you select a wrong drive to erase.
- Human errors. Unplug external device without ejecting, disconnect the drive while transferring data, and other errors will make your data lost sometimes.
- System crash. If there are issues with the drive or system, it would cause system crash and lose the important data on the drive.
- File system crash. If the file system of a drive is damaged somehow, you may fail to access the drive and lost the data on the drive.
- System upgrade. Sometimes, there will be issues happen while system updating. If you failed to back up the data before, you may also lose the files.
Also, there are some other unknown issues that will cause data loss on Mac. No matter what happened that cause data loss, the most wanted thing you want to do is to get the lost data back as soon as possible. In such a case, an effective Mac data recovery application is the only thing you want. Fortunately, you have a great chance to recover the lost data successfully with Do Your Data Recovery for Mac. Before you purchase the software, you can download and have a try with the free trial version.
Tutorial: Steps to recover lost files in macOS Big Sur
Do Your Data Recovery for Mac is very professional to recover lost files. However, the software is not hard to use for any users. The simple interface make the software simple and easy to use. With only a few clicks, you can recover lost files successfully with the software. You can do as follows to recover files in macOS Big Sur step by step.
Step 1. Launch the data recovery software on Mac. In the device list of the software, please choose the drive on which you lost data.


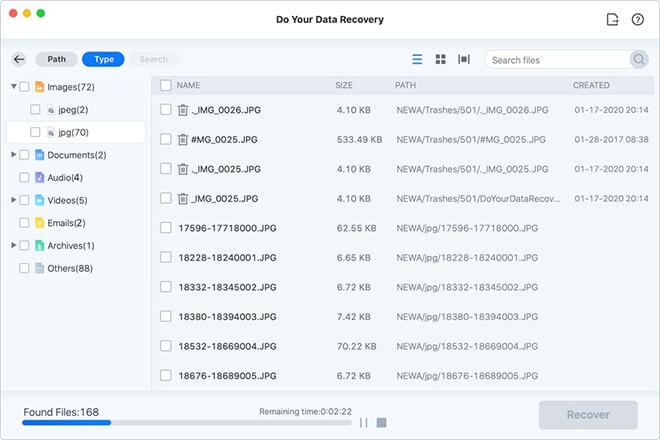
Step 2. Please click the “Scan” button to continue. The software will then scan the drive. It will analyze and try to locate any lost data on the drive.
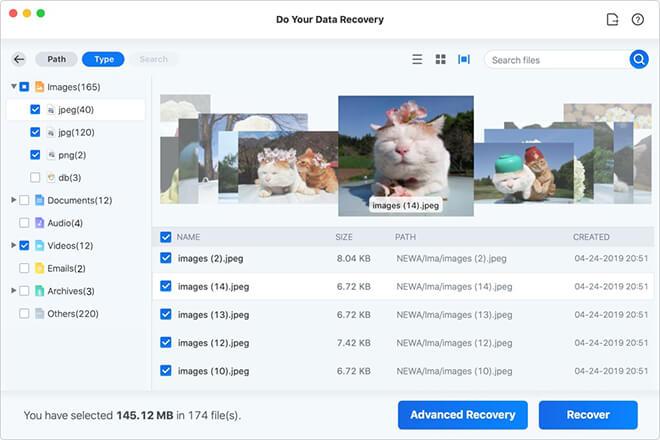
Step 3. Once the scan process is finished, you can check and search for the wanted files. Choose the wanted files to recover directly.
Note:
- After data loss happen, please step using the hard drive immediately and avoid writing new data to the drive.
- Please ensure to save the recovered files to another drive instead of the same drive where you lost data.
The software Do Your Data Recovery for Mac can also recover lost data in other operating system, like macOS Catalina, Mojave, or other old Mac systems. It’s able to recover deleted files from APFS, HFS/HFS+, ExFAT, FAT, and other file systems on Mac. If you lost data in any situations, you can download and have a try with this professional Mac data recovery software.