Sadly, you cannot directly upload MP3s to YouTube.
You must convert your audio files to MP4s or YouTube to MP3 because the video site needs video files. This implies that in order to post a podcast to YouTube, there must be a video component. Simple static images are acceptable, but there must be background “playing” content.
The four most well-liked methods for beginning and publishing a podcast on YouTube are:
1. Make a video out of your audio file
The most straightforward strategy is this one. Start here if you want to upload your podcast to YouTube in the shortest amount of time possible. It only requires that you turn your audio file into a video and add a static image to the background.
The background image should be made first. Consider using a free program for graphic creation like Canva or Snappa. To avoid starting from scratch, each has templates that you can use.
What ought to be shown on that graphic? The URL of your website, your name (“Hosted by”), your logo, and any other relevant information. For the greatest effects across all devices, YouTube suggests that photos be 2560x2240px in size.
Next, convert the audio file, and then include the background picture. You can add one or more images to play throughout the film and upload an audio track that lasts for 60 minutes using the tools. Additional effects like sound waves or subtitles are also an option. The MP4 file is then available for download and upload to YouTube.
2. Display on your webcam
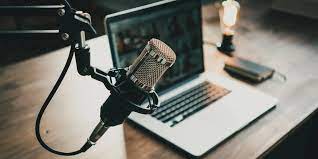
Present your podcast into your webcam if you want to go one step further and make a real video. Since you don’t need to buy any equipment, this configuration is ideal for testing out posting a podcast to YouTube. Use the built-in webcam on your computer and connect your microphone to it.
You can record your voice using QuickTime or Zoom. Double-check your microphone settings to ensure that the tool is picking up your podcast microphone rather than the computer’s built-in one.
Either record everything in one take with minimal editing afterwards. Alternately, you might do a vlog-style edit, where you remove any minor errors and piece the entire thing together. Try Lightworks for straightforward trimming and editing, plus it offers ready-to-use audio and video effects.
3. Establish external cameras for recording
Consider setting up a camera to record your performance if you do your podcast at a desk in a neat space. Gary Vaynerchuck, a prolific podcaster, uses this method to record each of his shows.
Simple equipment is all you need for this. Even if you can achieve a high-quality recording with only your smartphone, you should probably also acquire a cheap attachable tripod to keep the video stable.
There’s no need for a complicated set behind you either. Put your camera at the recording location, and note what it captures. You can proceed after making the area in the frame presentable.
Users of this setup for podcasts frequently record entire seasons at once. That implies there won’t be any post-production editing, but it also means you have to get a terrific episode the first time. Spend more time on your podcast script and have your co-host or guest on the same page to make sure everything goes well.
4. Screenshots of you and your distant visitor
Set the software you use to do your podcast interviews remotely, such as SquadCast or Zoom, to record both the audio and the video. To publish a podcast on YouTube, you’ll end up with a split-screen video.


